Saturday, April 2, 2016

Cabinets and flooring and paint!

I think I mentioned last time that as part of our fridge screw-up, we were getting an extra 7" wide cabinet. It arrived! Snazzy, right?


After that was in, Devon (and J) went ahead with install of the giant refrigerator panels and massive upper cabinet. I installed the doors and found them to be super wonky. I tried adjusting the hinges, but as fancy as they are, they wouldn't adjust enough to fix the doors. We finally determined that the cabinet was racked and needed to be fixed. Boo! 

To fix it, we took out all the screws in the side, then used the car jack and a 2x4 to hold the front corner in the right spot. Devon gets all of the cleverness points for that idea! 


Here it is! The doors are only minimally wonky now. 


That photo also shows another thing Devon finished - the floor! I love it, even more than I expected to. It's a cork laminate floating floor. We went with this type of cork because we read that the glue-down tiles will show imperfections in the subfloor. We knew we had plenty of those, and we had no great desire to fix them. Devon laid the whole floor himself, so I can't say how it went. He did mention that the setting kit we got from HD was pretty key. It had spacers, a setting block, and a bar that you use at the edges. The seams are very smooth and hardly visible at all. 

We read some conflicting information about whether or not we needed to seal the floor. The planks are presealed, but since we got a kind of cheap floor and because we were worried about spills and swelling at the seams, we decided to seal it. We used a water-based polyurethane specifically for flooring and applied it with foam rollers. By "we", I obviously mean Devon. This blog post was really helpful! 


Close-up so you can see the pattern. So pretty! 


We've officially finished the cabinets! We haven't finished trimming them out, so don't get too excited. Anyway, here's the dishwasher space. We thought it would be a 3-sided actual cabinet, but it's not. We still don't know why. Anyway, after much leveling and shimming and such, we screwed the panel to the wall and the floor. We installed a strut across the top front to make sure it stays nice and stable. We've gotten pretty used to the wide open space in the kitchen, so we're reasonably sure we'll smack into it sometime before all is said and done. 


And we used our Kreg Jig to make pocket holes! This way we can remove the strut from below after we install the countertops. We used it on the refrigerator panel, too. It's a little terrifying since you use the world's largest drill bit, but it works like a charm.


Here's the official last cabinet - our spice cabinet! Awesome, right? I'm honestly not sure if all of our spices will actually fit. I have a problem. 


And here's an overview of that bright yellow paint! We realized it's the only colored wall in the house. The current plan is to paint the dining room the same color. We also have orange backsplash tile in hand now, so the kitchen will soon be even more colorful. 


Partly just because I'm lazy, I haven't written about the countertops. I'll post a full update when they're done! Right now they're in the driveway with the slurry coat (to fill in small voids and pinholes) drying. 

We're slowly getting some of the rest of the house back to normal. We spent an evening this week cleaning the living room and moving the furniture out from the middle of the room. It feels nice to regain some small bit of normalcy. 

Sunday, March 20, 2016

The Kitchen Looks Kind of Like a Kitchen!

Dad left a week ago Friday and we've been on our own since. Gulp. Things are going okay, we've just been too busy for updates! 

Before Dad left, he made one last astute observation: The space for the fridge was not anywhere near large enough for the fridge. Um, oops? I'm still not 100% sure where we went wrong and I'm not entirely sure I want to know (because it's probably my fault...). Basically I think we made two disconnected decisions: one was to just leave however much wall we needed between the door and new opening; the other was to make the corner between the living room wall and the kitchen wall a nice tidy 90 degree corner. Turns out that decision two didn't play so nice with decision one. 

Anyway, we fixed it! We pulled the trim from the kitchen/hallway door and framed it a bit smaller so that the wall is large enough for the fridge and cabinet. Here the fridge's home as of today. The drywall around the door is primed but not yet painted to match the kitchen. 


Part two of the fix is an extra little 7" wide cabinet that our cabinet guy is finishing up now. Upside: more storage space? We went through just about every possible solution, and this seemed best overall. Hopefully when it's done it will all be lovely and it won't seem like we screwed up then tried to fix it. Stay tuned...

Before Dad left, he and Devon finished the kitchen drywall, painted the ceiling, and did a first coat of the gray paint. Doesn't it look great?! 


The cabinets were delivered Monday after Dad left. They look so so good. Here are a couple of pre-installation pictures:


I was bad about taking cabinet install photos, but I can ramble about the process a little bit. In the photo just above, you can see a base cabinet and also a toe kick/base piece. Those base pieces were installed first and leveled. Next were the uppers. Devon put a support piece on the wall at the bottom of each and then measured the studs and pre-drilled the cabinets. The ever fabulous J+K came over and helped us install them. Luckily there were only two, but one was massive, and one went over kind of a wonky bit of drywall. The cabinet install isn't done because we're waiting on our new cabinet and on one fridge panel that had some issues. 

Here are the cabinets today! The blue striped bit is the panel for the end, next to the dishwasher. The little lid piece (no idea what that's actually called) isn't really installed here - we still need to trim those down. Yesterday I put in the drawers and doors, mostly because we were worried about ruining them with them stacked all over the house and garage. They definitely make it look more finished! 


Here's the other side. The range is super heavy and hard to move (luckily Dad and Devon brought it in before Dad left!), so that's why we've left it stylishly located in the middle of the room for now.

Here are some cabinet glamour shots. They're so nice!


Devon has also been working away on pantry drywall and other drywall patches. For some areas, we need to attempt to match the texture of the old drywall, but the inside of the pantry is all done and primed.


Today we got a start on the concrete countertop molds! We made two so far, both for the sink side of the kitchen. We're basically doing whatever Fu-Tung Cheng tells us to in his awesome book. I mean, except where we're blatantly cutting corners. Here's the bottom of the big mold in place for final measurements. We wrote all over the bottom to make sure we wouldn't screw up which side was inside versus outside of the mold. 

And here's the finished mold! Before it's ready for concrete, we need to seal the inside corners and put in the rebar. I made a trek to Berkeley to buy admixtures, slurry mix, sealer, wax, and polish from Cheng's shop. Yesterday we got the concrete itself. Poor Devon had to move 5 80-lb bags 3 different times while I stood around and watched.

And one last random project - I made some charming templates for the cabinet hardware. I started drilling the holes earlier, then I got hungry. Now I'm on the couch and fairly unwilling to get up. More pictures to come when I find my motivation.

Sunday, March 6, 2016

On Almost Dying in a Fire and/or Earthquake

Hysteria first, backstory later:

OMG, WTF:


What you see are the charred remains of the inside face of the drywall and the charred top plate where the in-wall furnace used to be. The drywall is just white in that one spot because it crumbles and falls apart when touched. This is all very bad and very scary, but we are all fine. 

Okay, backstory:

Today Dad and Devon finished with the drywall sanding and mudding at 4:00ish, so they decided to start in on the pantry framing. The pantry was on the "nice to have" list in terms of things to do while Dad is here, but since nothing much can happen while the mud is drying in the kitchen, there's a little time to work on it. 

There was an old boxed-in chase in the hall just outside the kitchen. Long ago there was a furnace in the crawl space, plus the kitchen stove vented into this chase at some point, plus maybe something else. Anyway, nothing in there is in use anymore, so it was just taking up space. The grand plan was to take out the vent pipes, take out the in-wall furnace, build a pantry, and install another form of heat (something hydronic, possibly underfloor). We had the demo guys remove the actual vent pipes (one was transite - not something we wanted to touch), but we still had the heater and the framing from the chase. We don't have a full plan in place for the new heat system yet, but since it's not that cold and the old heater wasn't that good anyway, we decided we can get by with electric mattress pads and maybe some electric space heaters for awhile. 

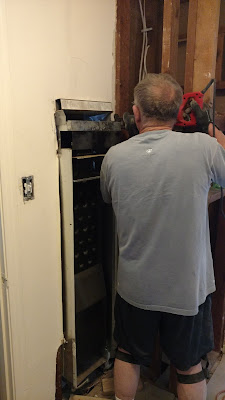
After much cursing and muttering, Dad and Devon got the furnace out.

We discovered a pretty shocking number of horrible things upon removing it. First of all, the vent pipe wasn't insulated and/or wasn't placed/braced properly. It was obviously getting way too hot, hot enough to char the drywall and the framing.


Next, the framing is a total disaster. This is the most major bearing wall in the house, and both top plates are completely missing. 


It looks like they were removed by chewing, or perhaps with a dull butter knife. Super shoddy. 

The bottom plate is also completely missing. There was no need to remove it! Just put the heater on top of it! As Devon was cutting a clean line in the drywall (to make patching easier), the stud he was cutting down the middle of fell out of the wall. It wasn't continuous, but instead there was some random cross member and then a little cripple stud that just went to the subfloor since the plate is missing. And it was obviously not nailed to any of the other framing. Here's the random cross member and cripple after the stud fell out:


Ugh, such a mes. 

So that's where we're at. We have no heat, we have an extra little doorway to the hallway, and we have some framing to patch up, but we did not die in a fire or an earthquake. Upside! 


Saturday, March 5, 2016

Milestones

The project is coming along at a pretty good pace. Even though we have a ways to go until it's complete, we've ticked off some important milestones lately.

On Thursday we had a fully functional bathroom!


There's a fair amount of finish work to do, but it's all working and not leaking (as far as we know).

It was also our first night back in the house. We were all a little cold (the heat is off since it would all just go through the gaping holes and into the attic), but we've since plugged in the heated mattress pads.

Tonight we had our first meal back in the house. I think we did alright with a grill and a microwave:


The living room is still a bit of a war zone, but I cleared off the couch and vacuumed a little no-shoes zone:

In actual work progress, the kitchen is fully drywalled! This is after taping and mudding. There's a lot of sanding and mudding left to do still. 

We've also been plugging away at installation of outlets, switches, and fixtures (PUN INTENDED). Let the record show that today I single-handedly assembled and installed a ceiling fan! I didn't electrocute myself, it works, and it hasn't fallen down yet. I did have rather a lot of parts leftover, though. Devon has in fact electrocuted himself several times, but he seems fine except for that slight tic. He might have had that before - can't be sure. 

Oh, and we bought and installed a medicine cabinet, but I forgot to take a picture. When the bathroom is 100% done, I'll post many more photos! 

Wednesday, March 2, 2016

An Update in Pictures

Too tired for words. Here are some pictures instead!

Some drywall in place so you can see what the kitchen will feel like
Modified framing for the new spice cabinet
Setting tub surround tile
Our new tile saw is serving us well
Marble window sill in the shower, metal tile edging
Tile done! 
I found this hole covered in blue tape. Electrician is back on the shit list.

Sunday, February 28, 2016

Kitchen and Bathroom, Week 2

Week one of the project was mostly demo and rewiring, as I think I talked about last post. Week two has definitely been more interesting and hands-on. Here's an update with lots of pictures!

Last weekend, M, J, and K (who are all the BEST) helped with some prep work. We fixed up the framing where the old medicine cabinet was, built two temporary walls (one simple enough, one a total pain) to support the kitchen and dining room ceiling joists while we installed the new header, and did some cleaning and organizing in the garage and shed. I didn't take any pictures, unfortunately, but this was hugely helpful for getting our week off to a good start!

Monday we basically went to the hardware store repeatedly, but lots of different ones. Devon picked up the DensShield for the shower backer from a specialty building supply place (more on this material below) then together we went to the lumber yard for new headers, posts, and other assorted lumber. This is after we had the LVLs cut to a reasonable length - luckily it's not a long trip home:

After we picked my dad up from the airport, we showed him the project then went to a normal hardware store for lots more general stuff and our first load of drywall. 

Tuesday was a day of huge transformation for the kitchen. Here are a couple of before and afters:
Right after demo
After!
Right after demo, from inside the kitchen
After! 
The wall between the kitchen and the living room is a bearing wall, but only kind of. The ceiling joists switch direction at that point, so bearing on that wall are just the joists from the kitchen/dining side. It doesn't have an roof load or any load from the living room side. I tried my best to remember college structures class to figure out what we needed for the new header. What we installed (2 1-3/4" x 9-1/2" LVLs) is WAY overkill for current loads. We've talked about eventually adding a second floor, though, and we wanted to go ahead and design for actual live loads above. Anyway, we used LVLs (laminated veneer lumber, a type of engineered lumber) because I found them to actually be way easier to size than standard lumber. They're very predictable and the load tables are very readily available and reliable. Here's the sheet from our permit set where I showed the tributary area and load calculations:
The little elevation on the right shows what the whole deal will look like from the living room. 

The wall between the kitchen and dining room wasn't supposed to be a bearing wall (it runs the same direction as the joists), but we noticed a couple of struts from the roof bearing on it. We decided that we'd put in a header just to be safe. For that wall I did some really rough calcs and found that a single 2x6 would probably do the trick. So, naturally, we put in a double 2x8 header. More is more, right? For both headers, we used Simpson brackets wherever possible to help strengthen the connections and deal with lateral loads. Here's an ACE4 in place at the big header:

Jumping ahead a little, here'd the intersection of the two new headers. The strips under the LVLs are to deal with the electrical boxes for bar lighting. The 2x4s are just to bring the smaller header down to the height of the bigger one:

Anyway, do you believe that Dad and Devon did all of that framing in less than a day?! It was really fun to see such a huge impact from a day of work. M, J, and K will be pleased to know that the temp wall did the trick and the house did not fall down. 

Where was I? Wednesday? I don't remember what happened Wednesday, or with any specificity what happened on Thursday or Friday, for that matter! Devon smushed his phone screen in one of his many trips under the house, so we're a little lacking in documentation. Here are some pictures of some things that happened sometime! 
Dad and Devon working away - you can see half of the temp wall here.
I patched up some building paper and insulated the exterior wall in the bathroom.
Here's that fancy new utility sink and absurd faucet!
New tub! Connecting to the old drain pipe (not touched in the repipe) was
apparently not a good time. 
Left is where Devon had to take a sawzall to the old drain piping.
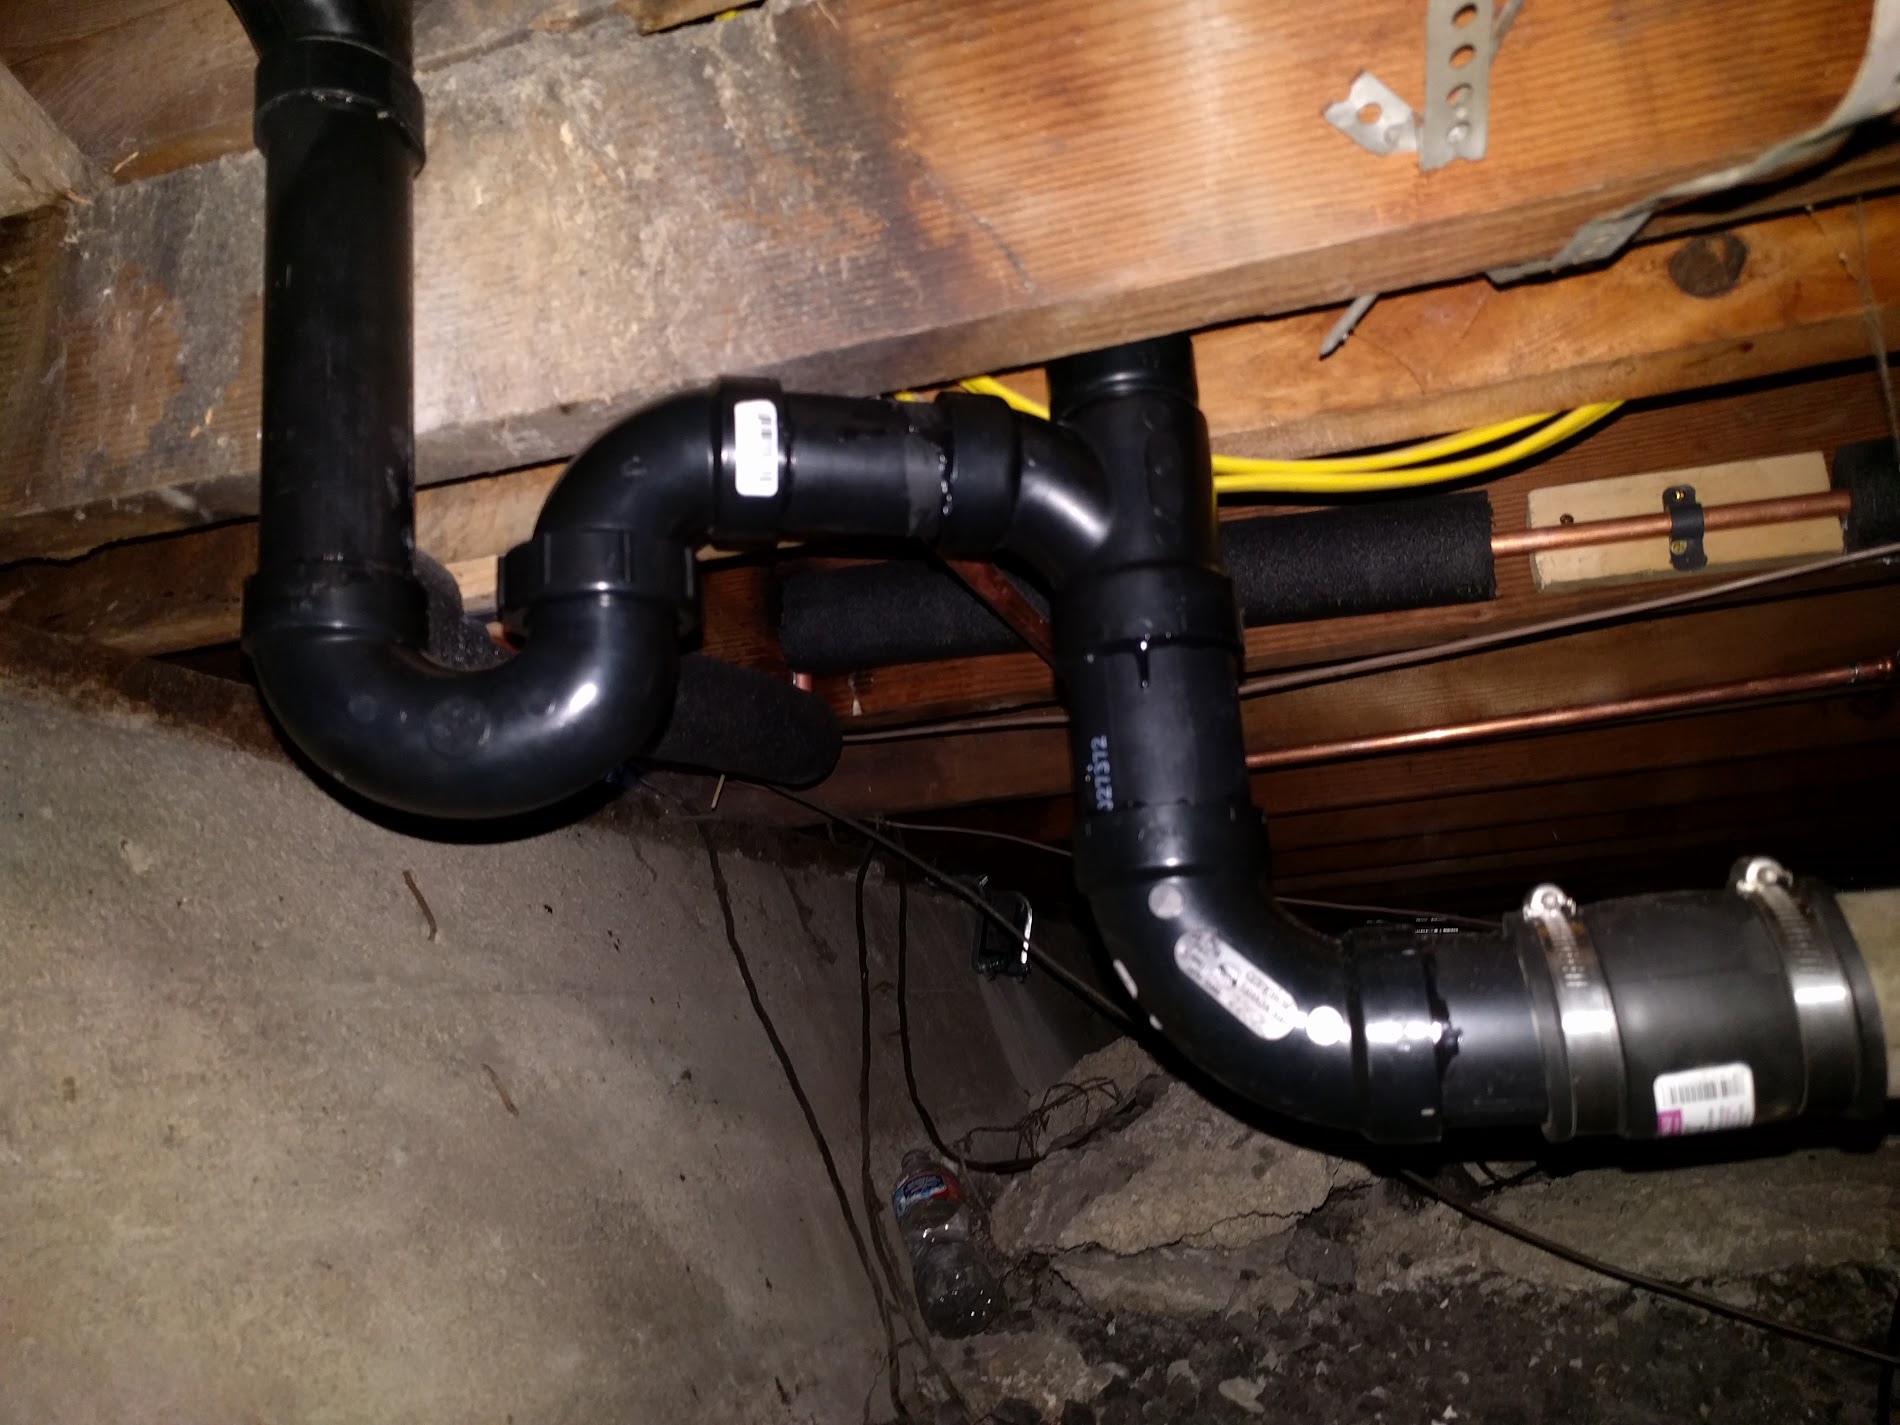
New drain piping from the tub
Oh, and in some unpleasant but not very visible work, Devon finished up installing some new foundation supports. Since we switched from a bearing wall that was in turn bearing on lots of floor joists to a header that's bearing on two points, we needed to support those points. We used prefab concrete footings and super heavy duty adjustable steel post jacks. 

That kind of brings us to today, which I do remember! Dad and Devon had the bathroom floor tile set and a lot of the tile backer and drywall in. They finished up the walls, I taped the tile backer joints and waterproofed the window, and we grouted the floor. 

A few shots of the floor tile:
Set in thinset - Dad and Devon did all of the measuring and fitting on Friday
Devon picking excess thinset from between the tiles. So detail oriented!
Grouted!
Here's the shower at the end of the day - DenShield installed, joints taped (fiberglass mesh tape and thinset, per the manufacturer's instructions), and window surround blocked out and waterproofed with RedGuard. By the way, we are no shower experts, but here's why we picked DenShield: For one, it's allowed by the residential building code in California (greenboard is not), it's easy to use (scores and snaps like drywall), and it doesn't require either a vapor barrier behind it or a full waterproofing layer over it. The only requirement is that you seal the seams. I'm  nervous about leaks at the window, so that waterproofing to seal up all of the joints and transitions at the window is extra. 

We did some kitchen work, too. I insulated the exterior wall with recycled denim insulation: (dusty, but not itchy and fiberglassy!)

Dad and Devon worked on some of the more finicky bits of drywall, like around the light boxes on the header: (they're having to put two layers of drywall in several places. We're not convinced the electrician used the best boxes for the job here, but it's too late now!)

Tomorrow the agenda is to mud and tape the bathroom drywall, put another coat of waterproofing around the window, then start setting tub surround tile. 

We're all tired, but it's great to see the progress we're making!