
The bathroom has been finished since... awhile ago, but I just finished the shower curtain yesterday.
First, I'll remind you how ugly it was before, so that you realize that anything would have been an improvement.


And now!


Here's the run down of the work we did:
- Regrouted the floor (I already posted about this awhile back)
- Replaced the toilet
- Replaced the vanity, sink, and faucet
- Replaced the medicine cabinet
- Replaced the vanity light
- Replaced the towel bars
- Replaced the shower curtain rod
- Added a shelf
- Added a curtain for the window
- Added a light and fan above the shower
- Patched drywall
- Replaced light switch and outlet covers
- Painted
I probably have photos of every single item above, but I'll attempt to stick to the highlights.
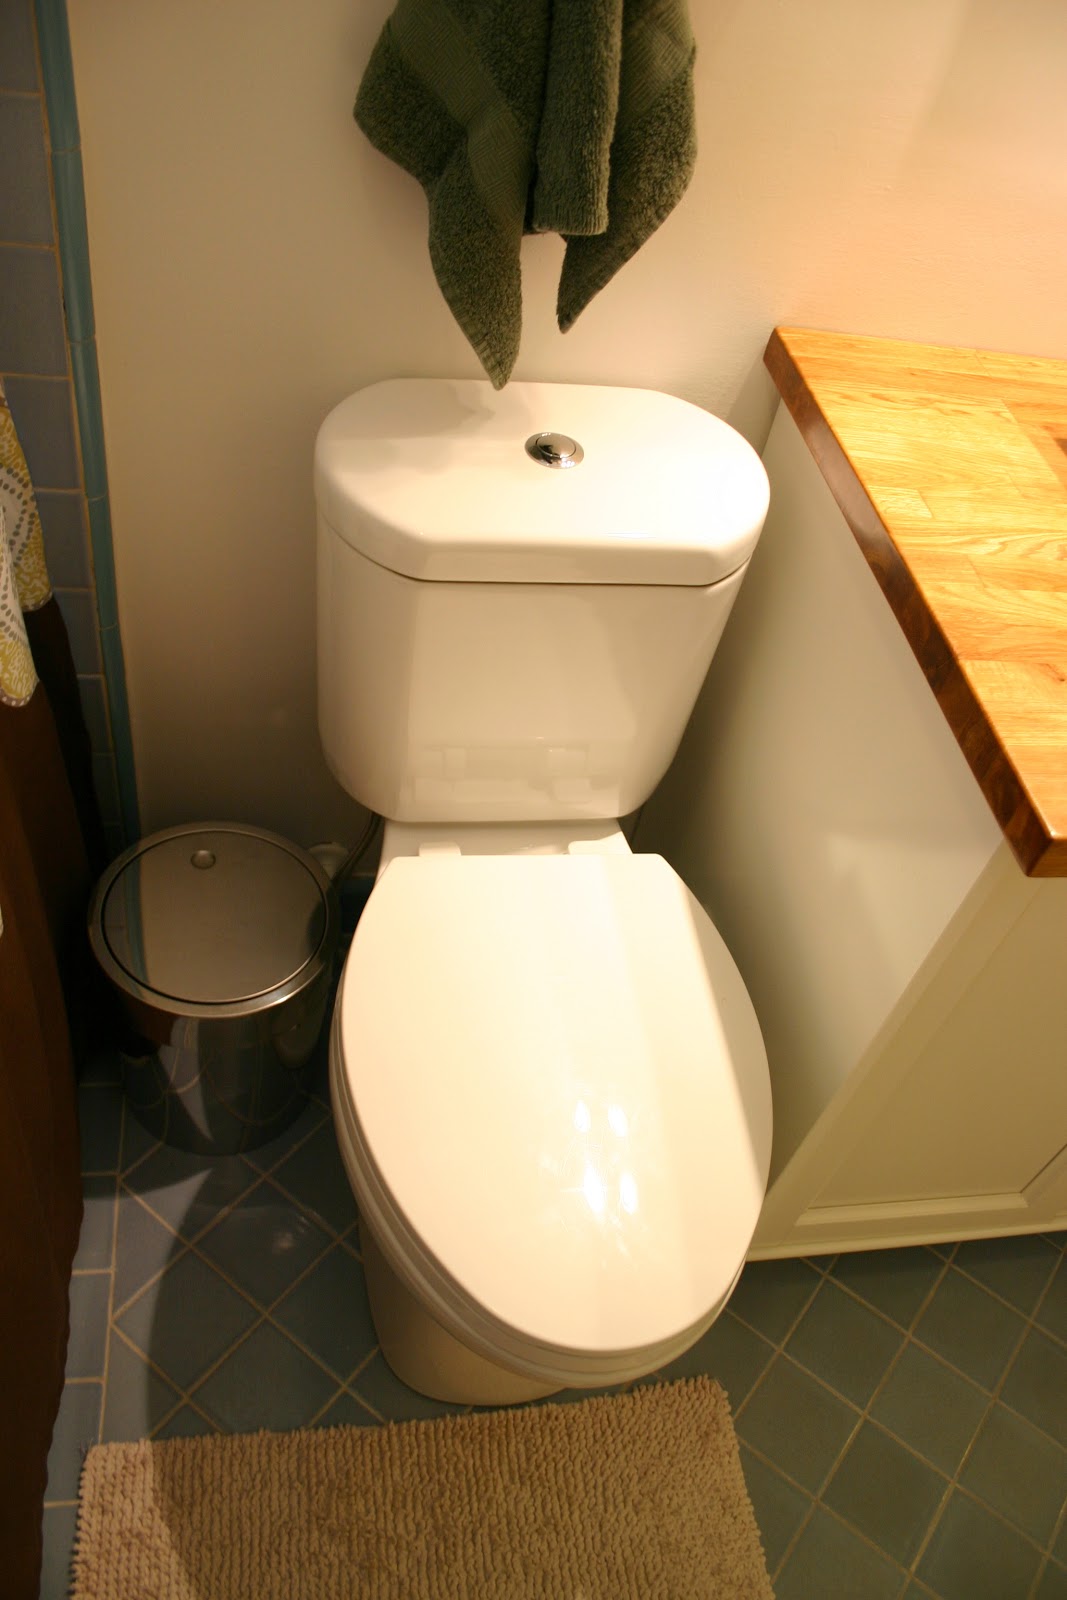
The old toilet was enormous and used 3.5 gallons per flush. Who needs that kind of guilt every time they flush the toilet? We decided to replace it with an efficient and small toilet, so that we could sleep well at night and put in a larger vanity. Anecdotal evidence suggested that replacing a toilet was not that hard, so we jumped right in.
Our only real mistake was that we tried to remove the old toilet tank, paint behind it, and put it back. Naturally the flex hose sprung a leak and we had one evening with no functioning toilet. Oops.

Gross paint. Missing from this photo is the sponge that was stuck behind the tank.
Once we got started the next day, everything went surprisingly smoothly.

We discovered that cleaning old wax rings is gross and that our toilet had a flange with hand-cut notches.

After cleaning the floor as much as possible and painting the wall, things were looking up. (The white stuff on the left is grout that I hadn't cleaned off of the tiles yet. I don't recommend waiting for weeks to clean it off completely...)

See? Devon LOVES replacing toilets!
And what a toilet it is. It has the Power of Niagara!

Ta-da!

Next we tackled the medicine cabinet.

The old one didn't even open all the way because of the weird wood trim around it. The wood trim was glued to the wall by some jerk.

It's pretty satisfying to rip stuff like this apart. The old cabinet was sized to fit between the studs. We wanted to put in a bigger cabinet, so we had even more ripping stuff apart to do.

This whole thing proved to be more than a one-weekend job for us, so we installed some temporary measures.

Here's the extent of the drywall demo. At the top is the bracket and box for the light. We exposed a 2x6 old growth redwood double stud. Why on earth our bathroom is framed with such precious stuff, we don't know. I guess using lots of old growth redwood for framing wasn't a big deal back in the 1940s!

Here we have the stud removed and the drywall more or less patched. The white drywall mud patches are where we got a little overzealous with the sawzall and cut into the living room. Drywall dust in only one room just isn't enough, ya know?

We installed the light before putting the cabinet in so that we could reach inside the wall.

Unfortunately, we failed at math, and this happened. Yep, the cabinet was hitting the lights. Oops. It was actually not too painful to move the light up, but it did involve more drywall work. My FAVORITE.
Finally we had the cabinet and light both installed with no critical conflicts.

Hand drywall saws are not the most precise instruments, so the drywall edge looked pretty rough.

Using our awesome new mitre saw and most curse words available in the English language, we pieced together a border of quarter round trim. The cabinet we bought is an Ikea special and is not actually meant to be recessed. I assume that's why it has these super annoying little corners that we had to trim around, and why it doesn't have a handy self-finishing flange.

After we failed at nailing the trim in place, we resorted to a tube of liquid nails. Let the next bathroom-renovators deal with it! We used drywall mud to fill in the nail holes and weird corners, then caulked the joints between the trim and the wall.

All in all it looks pretty spiffy! Just don't let us catch you looking too close.
The vanity was easily the worse part of the old bathroom. The marbled teal top clashed horribly with the blue floor, and the cabinet itself was made of disintegrating fiber board with metallic gold trim.


The view behind the vanity was, if possible, even worse than the view of the vanity. Why did anyone with a conscience even produce this color of paint?
In another one of those super fun experiences with old plumbing, we found that the shut-off valves didn't work. We had to turn the water to the house off to accomplish what you see above. We got new valves and took this photo just to gross you out:

The old one is one the left. Obviously.
Somewhere in the middle of the vanity work, we painted the whole room.

You can also see our snazzy new curved double shower curtain rod here.

Voila! Our new vanity cabinet is an Ikea special, with a few modifications required to fit it next to the tile wall base.

Ikea has really nice butcherblock countertops, so we bought the smallest piece we could and cut it to size. Here we're trying out the sink and faucet placement before drilling holes. Devon put a really nice oil finish on the butcherblock.

Hole saws are cool!

I don't even want to think about/admit how many trips to the hardware store it took to assemble the sink plumbing. The finished product looks a little like Frankenstein's monster, but it works! We did have some leaks early on (thus the mixing bowl at the bottom), but they turned out to be because the gasket that came with our cheap sink drain couldn't be trusted. Since we reset it with a big gob of plumber's putty, it's been leak-free.

Here we are saying goodbye to most of the junk from the bathroom. The toilet and sink sat in the backyard for awhile before we got around to arranging pick-up with the city, but at least they weren't on the front porch, hillbilly style.
For good measure, here are even more "after" photos.
 |
| New towel bar |
 |
| The shower curtain that took me months to finally finish. I bought a shower curtain, then replaced the bottom portion with solid brown fabric. |
 |
| The curved shower curtain rod is awesome. You can hang towels on the outer bar, plus it makes the shower feel bigger. When my parents visited, Dad helped us install the fan and light. Thanks, Dad! |
 |
| The shower and tub are basically the same as before. We added a curtain (made from a shower curtain) to protect the window and wood trim. We bent the hook on a shower caddy to account for the thickness of the tile and hung it from a knob secured to a stud. |
 |
| The pretty light - and the cabinet even opens! |
 |
| I love this shelf even if it doesn't hold much useful stuff. I found the liquor bottle and the silver dish at my friendly local thrift store. |
 |
| We changed out the switch and outlet covers. Also, the blue canary in the outlet by the light switch is watching over us. |


