Showing posts with label house. Show all posts

Friday, January 2, 2015

Window Puns are so Transparent

Oh hey, loyal readers! I'm going to try super hard to post more than twice this year. Pinky swear.

The last several posts have been about the front yard, so I'm sure you're sick of looking at it. Let's talk about putting big old holes in the house, shall we? 


Even though I've failed to write about it once, we've managed to replace all of our windows! We did leave the windows in one room untouched. We plan to eventually put a sliding glass door in there, so there didn't seem to be much point in paying for windows that will only be in place for a few years. We plan to even more eventually make that room into a sort of bottom landing space for stairs to the super eventual upstairs. I digress. 

We replaced a total of 10 windows. We chose Milgard brand vinyl windows. They are not the fanciest or most expensive windows by a long shot, but we think they look pretty decent. They open and close, which is a novelty for us. They are double-glazed with argon and they have a low-e coating. Basically that means that you don't feel an actual draft standing near them. Winning!

We opted for new-construction type windows instead of replacement windows. They're more work, but we didn't have much faith in the existing frames. 

I felt pretty fancy when my window drawings were approved by the city! They probably would have been fine with a napkin sketch, but let me have my moment, okay? 


We started with the teensy tiny window in the entryway. We were able to master our technique without having to wrestle with big heavy windows. 

We became pretty handy with a pry bar as we removed all of the interior and exterior wood trim. The small window was easy to remove, but the big wood ones were pretty heavy. Our window-removing savior was what my family calls a go-to-hell tool. It's actually called an oscillating tool and you should buy one. Go on, you know you want to. We have a Bosch and have been happy with it, but there are many available. 


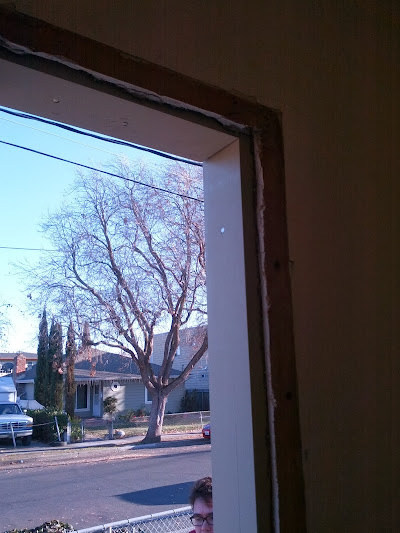
Anyway, here's the rough opening. The siding was in many cases super close to the opening.  


We wouldn't have had room for the window flange, so we nailed 5/4 blocking all the way around. We used some pre-primed lumber because 5/4 was hard to find and this was the best we could do. The window opening needs to be square and level, and you need the correct gap between the window and the opening. We were able to shim behind the 5/4 lumber to adjust the wonky openings.   

Next up we flashed the windows with Fortiflash. I'm going to decline to show detailed pictures of this because our method is so... unorthodox? Um, wrong? It was the best we could do given the situation, but I would never recommend it. Given that I sort of do this for a living, I'd rather not lead anyone astray! 

In any case, here's a window with the flashing in place. Don't try this at home. 


Putting the window itself in is basically the easy part, except that you've stupidly just covered it in sealant. Stick your hand in the sealant and you'll feel sticky for days. We learned some importance lessons about disposable gloves on this first window. We also learned some lessons about not putting windows in upside down. Oops!


Here's the before/during/after of our first window. The real after is still pending, because it still looks just exactly this ugly. 


Window trim is tip top on the 2015 to-do list. 

And now, because I have about a thousand window pictures, I shall make you look at more of them. 

Here's the bedroom - the window on the right is an aluminum replacement window of unknown vintage. Maybe 1970's based on the classy fake wood sticker on the handle. On the left is a new window. We used casement windows in the bedroom so that we're in compliance with current egress codes (these generally cover sill height and opening size). 


A few of the windows had a small sheet metal head flashing. When we pulled it down, we discovered it was installed by some very thrifty soul reusing some kind of insect killer container. 


We posted this photo on Craigslist and actually gave away many of the window bits. They're no good for installing in a house, but these folks seemed to have some crafty plans. 


The bathroom window replacement brought up an unfortunate tile situation. A trough between the tile and the window is undesirable to say the least. The tile is in rough shape anyway, so this just changes our timeline for replacing it. We're having a bit of a debate as to whether or not we can retile the shower ourselves. Feel free to weigh in! 


Here are the new front living room windows. This is the fix for the big hole Devon is standing in in the first picture above. 


Google very helpfully auto-awesomed one of my photos of the kitchen window replacement. It's like we live in a dreamy Mediterranean villa! I'd like my money back, though, because there's a big hole in my freaking villa. 


So that's that! We've lost momentum on actually ordering and installing the trim, but we did design it and make detailed cut lists and material lists. If the window trim ever happens, we'll tell you about it here on Over Do-It-Yourself! 

Sunday, March 17, 2013

Workbench Planning and Demo

Two posts in two days?! Don't get used to it!

While we're on the subject of the garage, I thought I'd share our next project. The garage had a small workbench, but it didn't have much in the way of storage and it was generally not that great. You can see it over in the corner under the pile of valuable stuff that was left here.


We spent an exciting Friday evening planning out how we wanted to build the new bench and designing it in AutoCad. Life as a homeowner is exciting!


We need to rent a truck to haul away the debris from the old workbench then buy materials for the new one. Yesterday we decided to spend the afternoon on the demolition portion of the project.

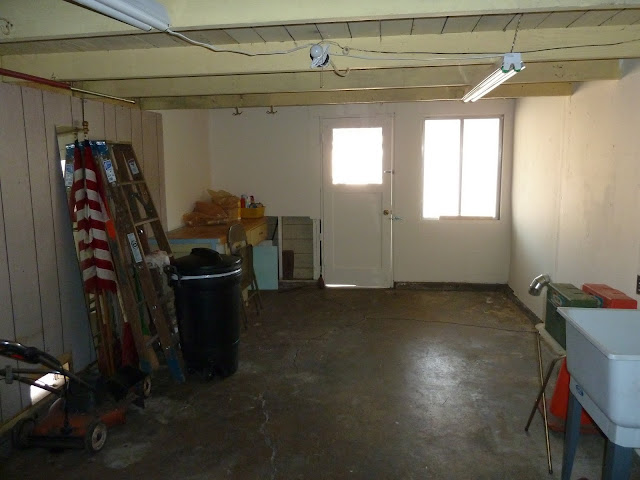
Prepare yourself for the cluttered horror that is our garage:


This is after 15 minutes of cleaning, too! Oh, and the contraption to the right is Devon's brew rig. You should help me peer pressure him into blogging about it.

Here's the old workbench after the junk has been cleaned up. Devon is considering mysteries of the universe.


We're going to build the new workbench out from the bare studs, so the awful wood paneling needed to go, for everybody's benefit. Underneath, we found this:


It's Stalwart Sheathing (also called Celotex, I believe), stapled together. There was some kind of masking tape on top of that. So, we decided that this stuff too must go, and started ripping. It all came down pretty easily, since it was held up by staples, small nails, and force of habit.


Inside the wall, we found treasures both living and dead! Living: some cool orange "organic growth". Dead: some kind of bug or bug shell.


We vacuumed up the dead bugs and carried on. The old workbench was surprisingly sturdy, but we won the battle. I think we're going to keep the top boards around for a later project - they're 2x10 redwood and just need to be trimmed and stripped.

Here's the corner where the workbench used to be. We're trying to pretend that that corner of the garage isn't visibly lower than the rest.


And the whole wall:


As you can see the inside face of the siding is water stained. Someone in the past ripped the building paper from between the studs. (Seriously, past home "improver"?) The REAL fix is probably to reside the house and do it right, but since that's not going to happen right now, we might just clean and paint and leave the siding/studs exposed. There's no requirement for sheathing on that wall, and no real need to insulate.

Stay tuned for another post about the fate of that wall and the new workbench!

Saturday, March 16, 2013

A New Garage Door

For the first time since 1989 (best as we can figure), our house has a functional garage door! We have so much stuff in there that we will likely never put a car in the garage, but it's SO nice to have outdoor access for big stuff and the ability to vent the space while working/brewing in the garage.

When we moved it, it looked like this:


It LOOKS like a door, but it's a lie. On the inside, it looked like this:


It was covered over with paneling, which was secured with tape and 2,000 tiny obnoxious nails.

Step 1 was to rip down the paneling. The door itself was, naturally, super gross.


One side of the door hadn't had a working spring in some time, so that was pretty easy to take apart. The spring on the other side was still engaged, so we really took our time and made sure not to kill ourselves with a rouge spring. Success! The spring hardware was apparently meant to stay put for the long haul:


After much cursing (as with most projects around here), we removed the spring hardware and all of the random bits of wood holding the door in place. It was sometime during this process that we found some newspapers shoved next to the door (weatherproofing, obviously). The oldest one was from 1989, so we assume that the door hasn't moved since at LEAST then.


It dawned on us that we had to make some really substantial progress before we were allowed to go to bed. If we still wanted the contents of our garage to be there in the morning, that is.


I'm going to spare you most of the painful details of the new door installation, for your own good. The short story is that we should have thrown the directions out the window before we even started, because not one single thing worked per the instructions. Our house is old, nothing is square or level, and garage door installation instructions are terrible. I guess this is why normal people pay a guy to install a new garage door?

Here is Devon working on the first panel. If we had this to do over again, or if I could give you a piece of marital advice for your own garage door installation, I'd say this: buy his and hers ratcheting wrenches in the right size. There's so much stuff to attach to the door panels, and it's an enormous pain without the right tools.


It was sort of like building a fort once we got going.


But as these things always go, as soon as we got the rhythm down, we ran into a huge problem. We got a reminder of the fact that nothing is level or square. As we stacked the panels, we could no longer connect them to one another because the whole door frame was so out of whack.

The diagonal pencil line is where we needed to chisel to to make the frame vertical. Sooo we bought a nice set of wood chisels! We wouldn't have any fun tools at all if nothing ever went wrong.


I'm fairly sure that we had to remove the first two panels and start over after the chiseling, but I've sort of blocked it out, to be honest.

By the end of the day, we finished our fort. We didn't even get started on the tracks, but at least we didn't have a giant hole in the house.


We had to shim one side of the door up a whole bunch in order to approximate level.


Day 2: Time to install the track. The attachment brackets didn't work for our set-up at all, so there was MUCH cursing and voiding of the warranty. Here's Devon installing our own special version of the attachment hardware.


This was my view from the loft. One thing that I must admit worked amazingly well was the level of the rails. We were able to attach them directly to the floor of the loft.


This brings us to the photo I posted awhile ago as a pop quiz:


It's hard to see, but the door was hitting the spring mounting bracket when raised. We used your standard brute force repair:


It works! We actually kind of hate the lock that came with the door, but we haven't gotten around to finding a new/better one.


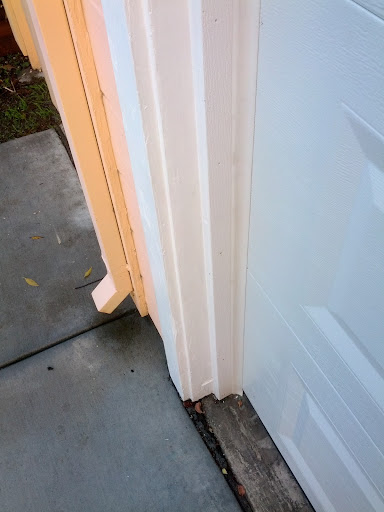
An embarrassing number of weeks after the door was functionally complete, we finally removed the temporary trim (needed to prop the door against before the tracks are installed) and put proper trim, weather stripping, and fresh paint on the exterior.


All done! This was kind of a big project, but very worthwhile. We actually don't think a garage door installer with half a brain would have touched it, so it's probably just as well that we stubbornly did it ourselves.

Today we started on our next garage project, which is what finally prompted me to write this post. Maybe I'll post about this new project in a more timely manner! Maybe...

Sunday, February 17, 2013

Bathroom Renovation

The day you've all been patiently waiting for has arrived: this is the long promised bathroom renovation post! 

The bathroom has been finished since... awhile ago, but I just finished the shower curtain yesterday.

First, I'll remind you how ugly it was before, so that you realize that anything would have been an improvement. 


And now!


Here's the run down of the work we did:
  • Regrouted the floor (I already posted about this awhile back)
  • Replaced the toilet
  • Replaced the vanity, sink, and faucet
  • Replaced the medicine cabinet
  • Replaced the vanity light
  • Replaced the towel bars
  • Replaced the shower curtain rod
  • Added a shelf
  • Added a curtain for the window
  • Added a light and fan above the shower
  • Patched drywall
  • Replaced light switch and outlet covers
  • Painted
I probably have photos of every single item above, but I'll attempt to stick to the highlights. 

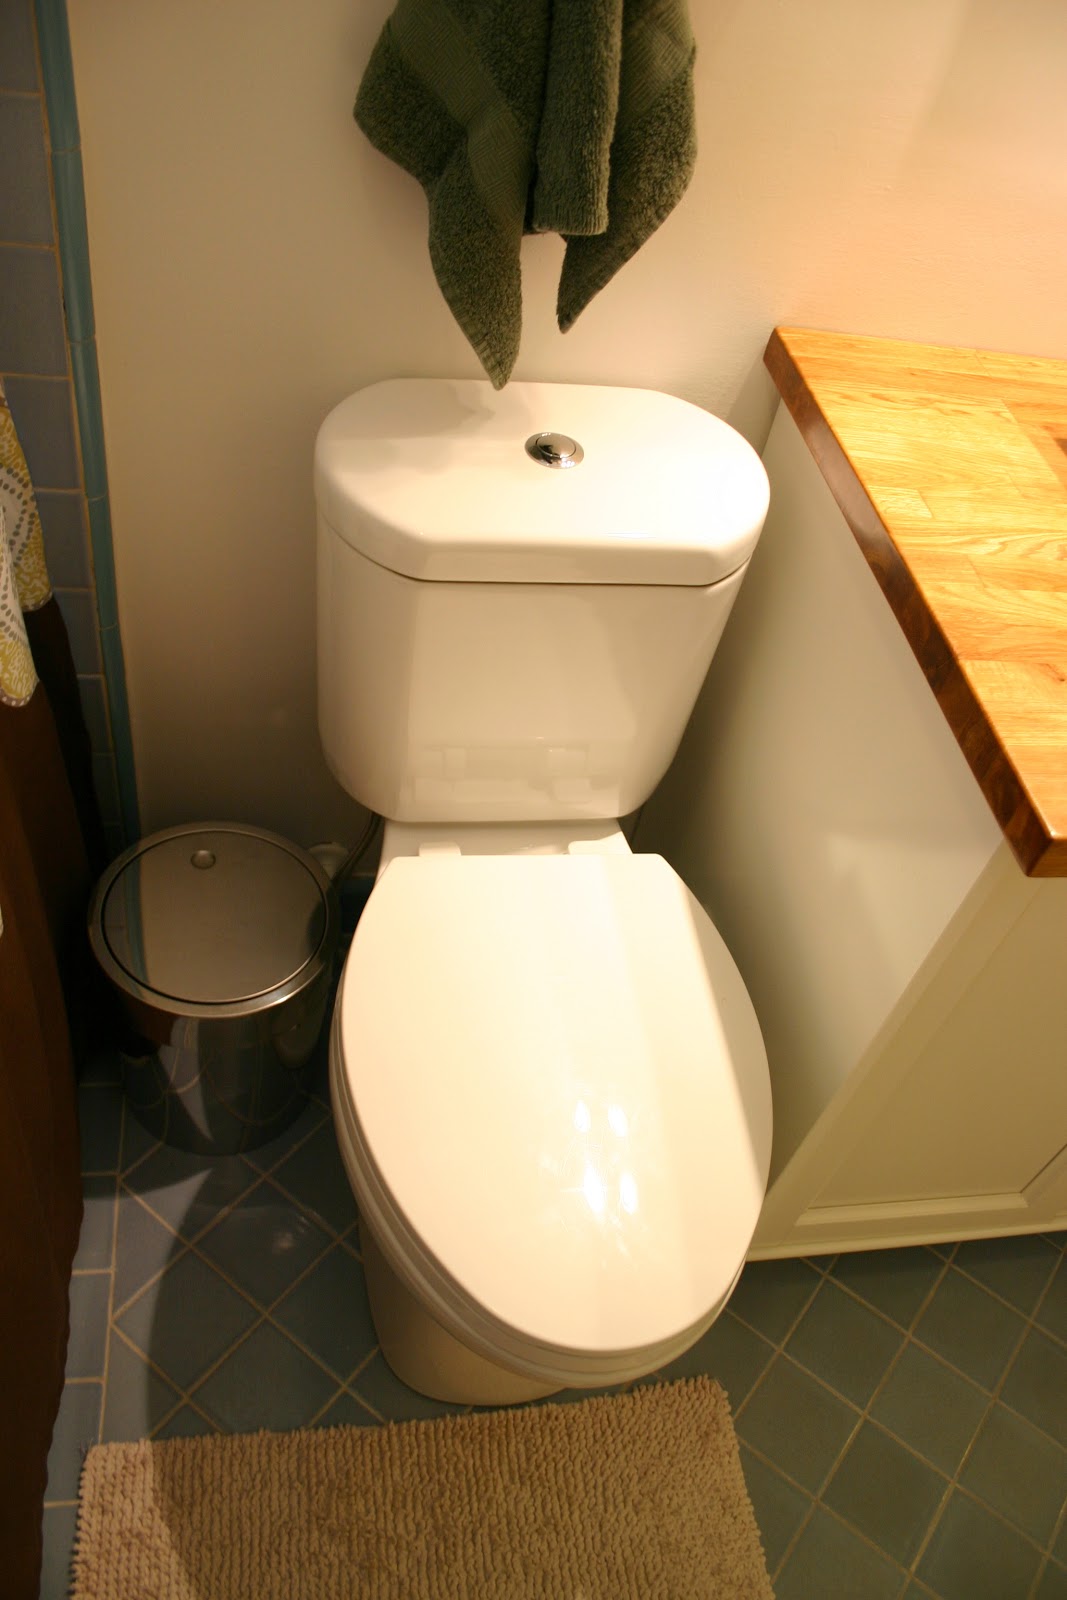
The old toilet was enormous and used 3.5 gallons per flush. Who needs that kind of guilt every time they flush the toilet? We decided to replace it with an efficient and small toilet, so that we could sleep well at night and put in a larger vanity. Anecdotal evidence suggested that replacing a toilet was not that hard, so we jumped right in. 

Our only real mistake was that we tried to remove the old toilet tank, paint behind it, and put it back. Naturally the flex hose sprung a leak and we had one evening with no functioning toilet. Oops.


Gross paint. Missing from this photo is the sponge that was stuck behind the tank. 

Once we got started the next day, everything went surprisingly smoothly.  

 
We discovered that cleaning old wax rings is gross and that our toilet had a flange with hand-cut notches.


After cleaning the floor as much as possible and painting the wall, things were looking up. (The white stuff on the left is grout that I hadn't cleaned off of the tiles yet. I don't recommend waiting for weeks to clean it off completely...)


See? Devon LOVES replacing toilets! 

And what a toilet it is. It has the Power of Niagara!


Ta-da!


Next we tackled the medicine cabinet. 


The old one didn't even open all the way because of the weird wood trim around it. The wood trim was glued to the wall by some jerk. 


It's pretty satisfying to rip stuff like this apart. The old cabinet was sized to fit between the studs. We wanted to put in a bigger cabinet, so we had even more ripping stuff apart to do. 


This whole thing proved to be more than a one-weekend job for us, so we installed some temporary measures. 


Here's the extent of the drywall demo. At the top is the bracket and box for the light. We exposed a 2x6 old growth redwood double stud. Why on earth our bathroom is framed with such precious stuff, we don't know. I guess using lots of old growth redwood for framing wasn't a big deal back in the 1940s!


Here we have the stud removed and the drywall more or less patched. The white drywall mud patches are where we got a little overzealous with the sawzall and cut into the living room. Drywall dust in only one room just isn't enough, ya know? 


We installed the light before putting the cabinet in so that we could reach inside the wall. 


Unfortunately, we failed at math, and this happened. Yep, the cabinet was hitting the lights. Oops. It was actually not too painful to move the light up, but it did involve more drywall work. My FAVORITE. 

Finally we had the cabinet and light both installed with no critical conflicts. 


Hand drywall saws are not the most precise instruments, so the drywall edge looked pretty rough.


Using our awesome new mitre saw and most curse words available in the English language, we pieced together a border of quarter round trim. The cabinet we bought is an Ikea special and is not actually meant to be recessed. I assume that's why it has these super annoying little corners that we had to trim around, and why it doesn't have a handy self-finishing flange. 


After we failed at nailing the trim in place, we resorted to a tube of liquid nails. Let the next bathroom-renovators deal with it! We used drywall mud to fill in the nail holes and weird corners, then caulked the joints between the trim and the wall. 


All in all it looks pretty spiffy! Just don't let us catch you looking too close. 

The vanity was easily the worse part of the old bathroom. The marbled teal top clashed horribly with the blue floor, and the cabinet itself was made of disintegrating fiber board with metallic gold trim. 


The view behind the vanity was, if possible, even worse than the view of the vanity. Why did anyone with a conscience even produce this color of paint?

In another one of those super fun experiences with old plumbing, we found that the shut-off valves didn't work. We had to turn the water to the house off to accomplish what you see above. We got new valves and took this photo just to gross you out:


The old one is one the left. Obviously.

Somewhere in the middle of the vanity work, we painted the whole room. 


You can also see our snazzy new curved double shower curtain rod here. 


Voila! Our new vanity cabinet is an Ikea special, with a few modifications required to fit it next to the tile wall base. 


Ikea has really nice butcherblock countertops, so we bought the smallest piece we could and cut it to size. Here we're trying out the sink and faucet placement before drilling holes. Devon put a really nice oil finish on the butcherblock. 


Hole saws are cool! 


I don't even want to think about/admit how many trips to the hardware store it took to assemble the sink plumbing. The finished product looks a little like Frankenstein's monster, but it works! We did have some leaks early on (thus the mixing bowl at the bottom), but they turned out to be because the gasket that came with our cheap sink drain couldn't be trusted. Since we reset it with a big gob of plumber's putty, it's been leak-free. 


Here we are saying goodbye to most of the junk from the bathroom. The toilet and sink sat in the backyard for awhile before we got around to arranging pick-up with the city, but at least they weren't on the front porch, hillbilly style. 

For good measure, here are even more "after" photos. 

New towel bar
The shower curtain that took me months to finally finish.
I bought a shower curtain, then replaced the bottom portion with solid brown fabric.
The curved shower curtain rod is awesome.
You can hang towels on the outer bar, plus it makes the shower feel bigger.
When my parents visited, Dad helped us install the fan and light.
Thanks, Dad!
The shower and tub are basically the same as before.
We added a curtain (made from a shower curtain) to protect
the window and wood trim.
We bent the hook on a shower caddy to account for the thickness of the tile
and hung it from a knob secured to a stud. 
The pretty light - and the cabinet even opens!
I love this shelf even if it doesn't hold much useful stuff.
I found the liquor bottle and the silver dish at my
friendly local thrift store.
We changed out the switch and outlet covers.
Also, the blue canary in the outlet by the light switch
is watching over us.